If you haven’t already, you should read my other article, Fruit and Nut Trees 101 for information on when, where and what to plant. Then come back here to learn how to plant.
There are three main ways for trees to be grown and sold: Balled & Burlapped, Container Grown and Bare Root.
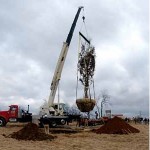 Balled & Burlapped or B&B means they balled the roots up and rapped them in a burlap sac. When they harvest the tree, they sometimes do some pruning of the roots. This means your tree may be top heavy, so you should prune the canopy and stake it to prevent it from falling over. In addition, watering and providing nutrients for these trees is more critical for root growth.
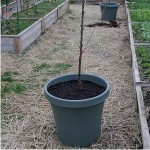 Container Grown trees are grown in a pot or container. When removing the container, gently set the tree on its side and push on the sides. This will loosen the tree and make it easier to pull out. Be sure to check to make sure the roots are not all bound up, tangled and growing in on themselves. This will cause the tree roots to malform as the tree matures. If this is the case, gently untangle the roots and spread them out while placing the tree in the hole.
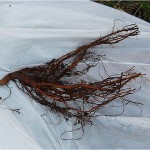 Bare Root trees are grown, dug up, washed and dipped in a hydro gel. The gel protects the roots and keeps them moist. Make sure to plant these trees asap. They can only be out of the ground about a week after they were harvested.
How to Plant a Tree
Step One – Selection and planning
Before you do anything you need to figure out what kind of tree you want and where you are going to put it. Make sure to keep in mind proximity, canopy size, and function when you choose what to plant and where. For more on selection and placement refer to this article.
Step Two – Schedule a planting day
It is important to get trees into the ground quickly to reduce the risk of damage and disease. If you schedule a day to plant, then you can plan your trip to the nursery accordingly and ensure you have enough time to plant. You can even start roughing out your holes ahead of time to save yourself time on planting day.
Step Three – Pick up the tree
When you get to the nursery, discuss the hardiness and needs of your tree with the arborist. When lifting your tree into your vehicle make sure to lift by the container or ball, so you don’t damage the roots. It is important to protect the roots, trunk and foliage during the journey home. So feel free to wrap them in a blanket.
Step Four – Measure and dig your hole
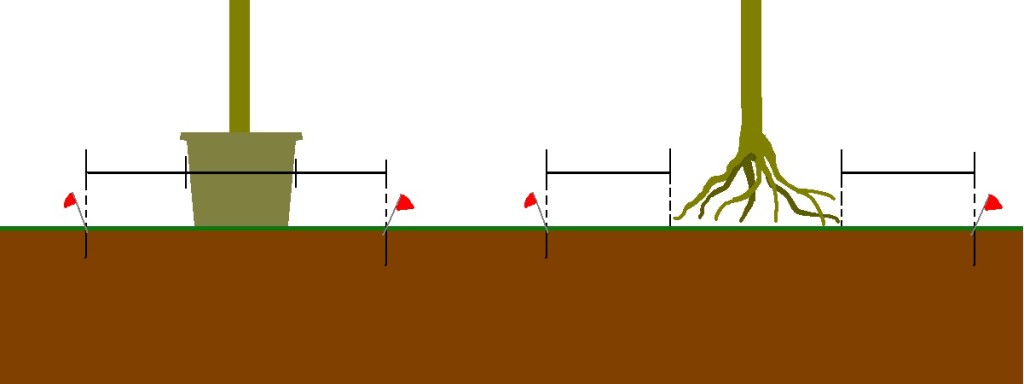
Assuming you already know where you are going to plant, set your tree where you want it and measure out an area around your tree so the hole is three “root sizes” across. Dig the hole deep enough that the tree sits at the same level that it did when it was harvested. *Tip – put the dirt your removed in a wheel barrow, on a tarp on a large piece of cardboard or on a piece of ply wood, so you can easily put it back into the hole when finished.
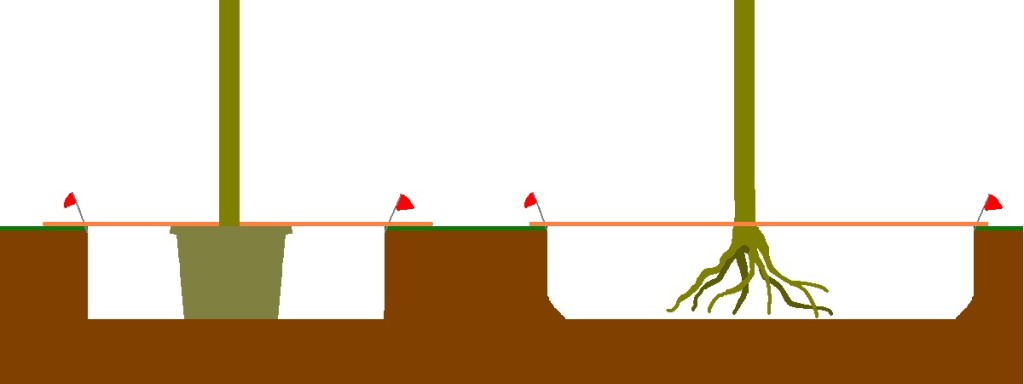
Step Five – Prep your tree
For Bare Root trees you will either need to shape the center of your hole like a cone or as a hill, depending on the variety of tree. For B&B and container grown trees you will need to gently remove the container or burlap and place the tree in the hole.
Step Six – Stake your tree
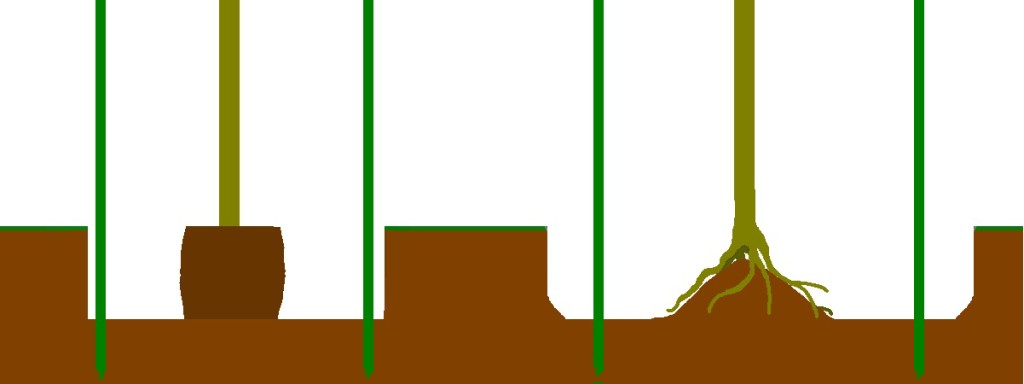
If you planted in a windy area, or if your tree has a small root ball and need support, now is the best time to stake it. This way you make sure the stakes go into solid ground. Make sure to leave room for the tree to grow and use bark safe strapping.
Step Seven – Back fill your hole
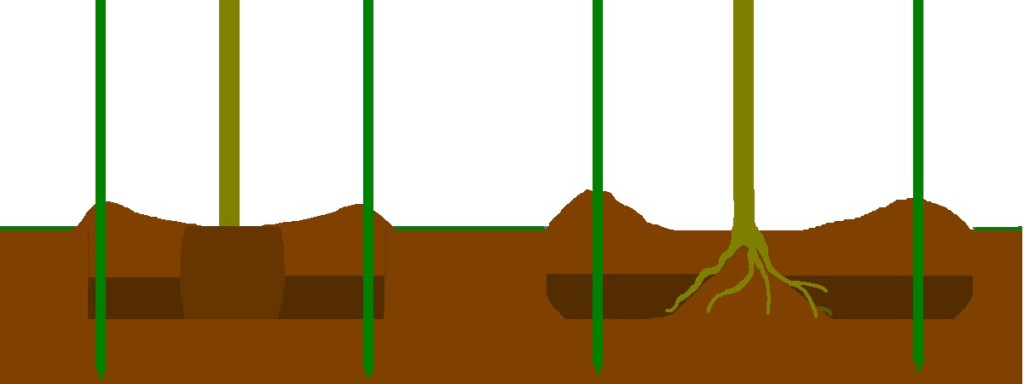
Here is a good chance to mix in some compost with the dirt you removed from the hole. Make sure you don’t put anymore than 50/50. Once the hole is filled, use the excess dirt to create an earthen dam around the tree to use as a watering well.
Step Eight – Water the tree
I know, this sounds like common sense, but you’ll be surprised. For the next few days the tree is adjusting to its new environment. During that time you should water it. This will help the soil settle, and the roots recover. Give it a good soak on day one, and just a little water the following days. Don’t drown it. Over the next few months watch your tree closely, it will need more water than usual. It’s roots were damaged during the planting and it won’t be able to absorb as much water or nutrients.
What’s next
If you use these guidelines and the tips you get from your nursery you should have a successful planting. After your tree is make sure you take proper care of it. For help with this go here.
Planting From Seed
Planting trees from seed is a little tricker than you would think. The first thing to consider is that a seed produces a tree based on the root stock and not based on the fruit. The root stock is usually a wild variety and usually has smaller, less tasty fruits, if any. Nurseries do this because the wild root stocks are disease resistant and usually hardier. Some root stocks can dwarf the size of the tree as well.
Not getting what you plant can be overcome though. You just need to plant the seeds and graft a branch from your original tree onto root stock of your saplings. If you don’t have access to the original tree, you should probably just buy a tree from a nursery. Every once and a while you’ll find a tree that hasn’t been grafted onto a wild root stock. In these cases, you get what you plant.
Either way, when planting a tree from seed you’ll want to first put the seed into the refrigerator for three months and then take it out. This lets the seed know that “winter” has come and gone, spring is here and it’s time to grow. I suggest you start your seeds indoors then move them outside in the spring time. You may need to over plant, because your success rate will be lower than when you buy seeds from the store. The only other trouble with planting from seed is that it is going to take longer for the tree to start producing. If you purchased a nursery tree, they have done all of the hard work for you and you could have fruit as soon as the next year.
Now that you know how to plant a tree, go out and plant one! Leave a comment below and tell me what tree you planted.
References
Backyard tips
http://www.crfg.org/tidbits/backyardorchard.html
Bare Root
http://www.umass.edu/urbantree/factsheets/24bareroottreeplanting.html
http://www.hort.cornell.edu/uhi/outreach/pdfs/bareroot.pdf
http://www.youtube.com/watch?v=Tttq3M739YA
Planting Techniques


This is some really good information about planting a tree. I want to plant several trees around my home. It is cool that you can plant a tree from a seed. It seems like might bit a little more difficult.